

Last updated on January 8th, 2024
Affiliate Marketing Disclaimer: I am an affiliate marketer with links to online retailers on my website. When people read what I have written about a particular product, click on those links, and buy something from those links, I earn a small commission from the retailer at no extra cost to the buyer.

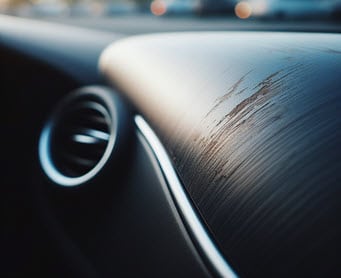
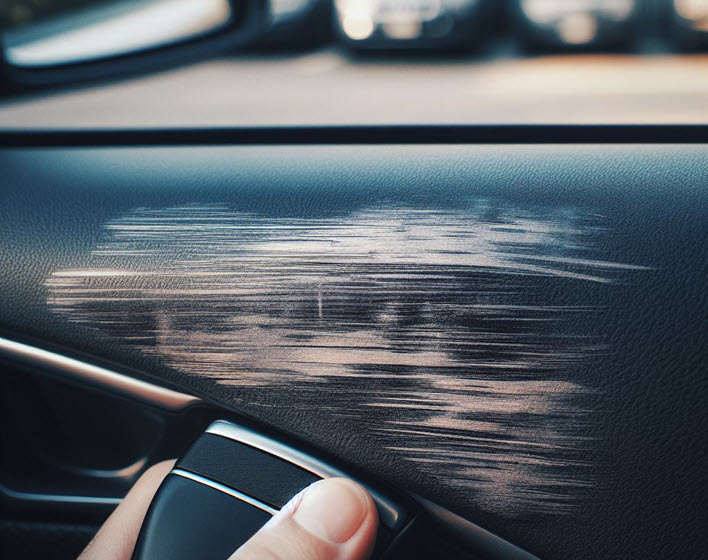
As a car owner, you know how important it is to keep your vehicle looking good inside and out. Unfortunately, scratches and gouges on your car’s interior trim can be unsightly and diminish the overall appearance of your car. Luckily, this post on how to easily repair or remove scratches from interior car trim will discuss the steps for removing scratches from interior car trim. You can easily do this task with the right tools and techniques.
Before you begin, it is essential to understand the type of trim used in your car’s interior. Different trim types require different repair techniques, so it is essential to identify the type before attempting any repairs. Once you’ve identified the trim type, you can gather the necessary tools and prepare the area before beginning the repair process. Depending on the severity of the damage, you may need to repair minor scratches or deep gouges or even remove and replace the trim altogether. With the proper knowledge and tools, you can restore your car’s interior trim to its original condition.
Key Takeaways
- Understanding the type of trim used in your car’s interior is crucial in identifying the appropriate repair technique.
- Gathering the necessary tools and preparing the area before beginning repairs can prevent further damage and ensure a successful repair.
- Depending on the severity of the damage, you may need to repair minor scratches and deep gouges or even remove and replace the trim altogether.
Understanding Car Interior Plastic Trim
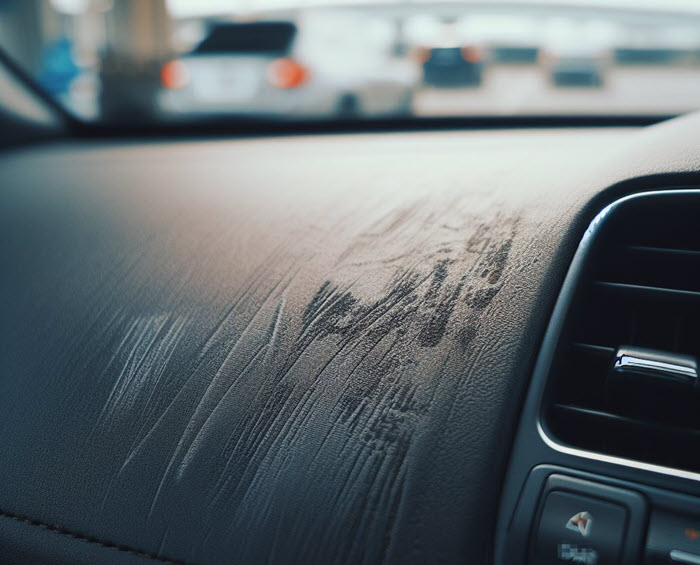
Car interior trim is used in vehicles to create a sleek and modern look. It covers areas like the dashboard, door panels, and center console. However, this material can become scratched or damaged over time, detracting from the vehicle’s overall appearance.
Different trim types are used in car interiors, each with different properties and characteristics. Some are more durable than others, while some are more prone to scratching. It is essential to understand the type of trim used in your car’s interior to choose the appropriate method to repair or remove scratches.
One common type of plastic used in car interiors is polypropylene. This material is lightweight, durable, and resistant to chemicals and moisture. Polyurethane is another type of plastic used in car interiors, known for its flexibility and resistance to abrasion. ABS plastic is also commonly used and is known for its toughness and impact resistance.
Appropriate tools and techniques are essential when repairing or removing scratches from car interior trim. Using the wrong tools or techniques can cause further damage to the trim and make the problem worse.
Standard tools used to repair scratches from car trim include:
It is also essential to clean the plastic thoroughly before attempting any repairs or removing scratches. A mild soap and water solution can help remove any dirt or debris from the surface of the plastic.
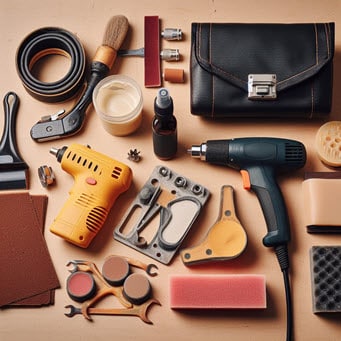
- Sandpaper or abrasive pads
- Plastic polish
- Heat gun or hairdryer
- Plastic repair kit
- Plastic Welders
- Trim Removal Tools
- Mr. Clean Magic Eraser
Overall, understanding the type of plastic used in your car’s interior and using the appropriate tools and techniques can help to keep your car looking its best. You can keep your car interior sleek and modern for years with the proper care and maintenance.
Identifying the Damage
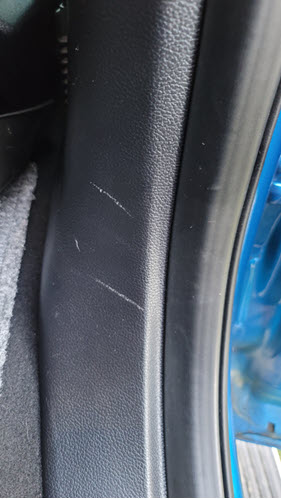
Scratches on the plastic interior trim of your car can be unsightly and lower your car’s value. Before attempting to repair or remove the scratches, it is crucial to identify the extent of the damage.
First, inspect the area where the scratches are located. Are the scratches deep or superficial? Superficial scratches only affect the surface of the plastic and do not penetrate deep into the material. On the other hand, deep scratches are more severe and penetrate deep into the plastic.
Next, determine the type of plastic the interior trim is made from. Different types of plastic have distinct properties and require various repair methods. Check the car owner’s manual or consult a professional to determine the type of plastic used in your car’s interior trim.
Once you have identified the type and severity of the damage, you can decide on the best course of action to repair or remove the scratches. Superficial scratches can often be repaired with simple DIY solutions, while deep scratches may require professional repair or replacement of the affected trim piece.
Remember, it is vital to take care when repairing or removing scratches from plastic interior trim to avoid causing further damage. Always follow the manufacturer’s instructions when using the appropriate tools and materials.
Gathering the Necessary Tools
You will need a few tools to repair or remove scratches from your car’s interior plastic trim. Here are the essential items you’ll need:
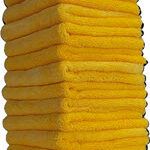
Microfiber Towels
Microfiber towels are essential for cleaning and polishing plastic interior surfaces. They’re gentle on plastic and won’t scratch or damage it. Use a clean microfiber towel to remove dirt, debris, and dust from the surface before repairing the scratches.
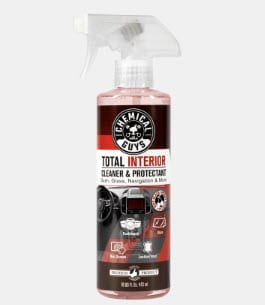
Plastic Cleaner
A plastic cleaner is specifically designed to clean plastic surfaces. It removes dirt, grime, and other contaminants from the surface, making it easier to see the scratches. Choose a plastic cleaner that’s safe for use on the type of plastic in your car’s interior. In this case, I use Total Interior Cleaner & Protectant from the Chemical Guys. The Chemical Guys have several scents of this particular cleaner. I prefer the Black Cherry Total Interior Cleaner because it makes my vehicle smell much better.
Plastic Polish
A plastic polish is designed to remove scratches and restore the shine to plastic surfaces. Choose a plastic polish that’s safe for the type of plastic in your car’s interior. Some plastic polishes also contain a protectant that helps prevent future scratches. Many plastic polishes, such as Chemical Guys, Meguiar’s, 3D Trim Care, and Novus, are available in the market. I would advise using 3D Trim Care, as it is an all-purpose polish and protectant. Some of the others I mention will probably work well but are more directed toward restoring plastic headlamp lenses, mainly when using power polishing methods.
Sandpaper
You may need sandpaper to smooth the surface if the scratches are deep. Use fine-grit sandpaper (around 2000 grit), and be careful not to damage the surrounding area.

Heat Gun
If the scratches are deep, you may need a heat gun to soften the plastic before repairing it. Be careful when using a heat gun, as it can easily damage the plastic.
My son-in-law purchased a Bauer Heat Gun from Harbor Freight so we could remove some decals and bumper stickers from his truck. The heat gun was reasonably priced. It is probably one of the tools I use the most in my vehicle detailing business.
Plastic Repair Kit
You may need a plastic repair kit if the scratches are too deep to be repaired with polish or sandpaper. These kits contain a filler designed to fill in deep scratches and restore the surface to its original condition. Choose a kit that’s safe for use on the type of plastic in your car’s interior.
I use a product called J-B Weld Plastic Bonder. It is a two-part, quick-setting urethane adhesive system for long-lasting plastic repairs. The product dries in a tan color, so you must find a touch-paint for your interior trim. It does not work on polyethylene or polypropylene. Another plastic repair kit that performs well for repairing the trim in your vehicle is the Loctite Plastic Bonder Epoxy.
Preparation Before Repair
Preparing the area properly before repairing or removing scratches from your interior car trim is essential. This will ensure that the repair is successful and the result looks professional. Here are some steps to follow:
- Clean the area: The first step is to clean the area around the scratch. Use a soft cloth and a mild cleaner to remove dirt, dust, or debris. This will help you see the extent of the damage and ensure that the repair is done on a clean surface.
- Mask off the area: Use masking tape to protect the surrounding surfaces once clean. This will prevent accidental damage to the parts that are not being repaired.
- Sand the area: If the scratch is deep, you may need to sand it to level it out. Use fine-grit sandpaper and sand in the direction of the grain. Be careful not to sand too much or too hard, as this can cause more damage.
- Clean the area again: Use a soft cloth to remove dust or debris after sanding. Ensuring the area is clean and dry before moving on to the next step is essential.
- Apply the repair product: Several products are available for repairing scratches on plastic car trim. Follow the instructions on the product carefully and apply it to the area. Use a small brush or applicator to apply the product evenly and cover the entire scratch.
By following these steps, you can prepare the area for repair and ensure that the result looks professional. Remember to take your time and be patient, as rushing the process can lead to further damage.
How to Repair or Remove Scratches from Interior Car Trim
It can be frustrating to see if you have scratches on your car’s plastic interior trim. Fortunately, there are ways to repair or remove these scratches.
Cleaning the Damaged Area
Before repairing or removing the scratches, you need to clean the damaged area. Use a mild soap and water to clean the area thoroughly. Make sure to dry it completely before moving on to the next step.
Masking Off the Area
Once the area is clean and dry, you need to mask off the area around the scratches. Use painter’s tape or masking tape to cover the surrounding area. This will help protect the rest of the trim from accidental damage during the repair process.
Repairing the Scratches
If the scratches are shallow, you may be able to repair them using a plastic polish. Apply the polish to a soft cloth and rub it into the scratches. Continue rubbing until the scratches are no longer visible.
For deeper scratches, you may need to use a plastic repair kit. These kits usually come with a filler and a hardener. Mix the two and apply the mixture to the scratch. Use a plastic scraper to smooth the mixture and let it dry completely. Once dry, sand the area with fine-grit sandpaper until it’s smooth. Finally, use a plastic polish to restore the shine.
Removing the Trim
If the scratches are too deep to repair or if you prefer to remove the trim, you can do so with a few simple tools. First, gently use a trim removal tool to pry the trim away from the interior. Be careful not to damage the surrounding area. Once the trim is removed, you can replace it with a new one.
Repairing Minor Scratches
If your car’s interior plastic trim has minor scratches, you can easily repair them. Here are the steps you need to follow:
- Clean the affected area with a mild soap and water solution. This will remove any dirt or grime that may be on the surface.
- Sand the scratched area with a fine-grit sandpaper. Use a circular motion to sand the area, and be sure to sand in the direction of the grain of the plastic. Sand until the scratch is no longer visible.
- Wipe away any dust or debris with a clean, dry cloth.
- Apply a plastic polish to the area. Use a microfiber cloth to apply the polish, and follow the manufacturer’s instructions.
- Buff the area with a clean, dry cloth. This will remove any excess polish and give the plastic a smooth finish.
- Inspect the area to make sure the scratch is no longer visible. If the scratch is still visible, repeat steps 2-5 until the scratch is completely gone.
Remember, this method is only suitable for minor scratches. If your car’s interior plastic trim has deep scratches or gouges, it may require professional repair or replacement.
How to Remove Scratches from Interior Car Trim
If you have scratches on your car’s interior plastic trim, you can try several methods to remove them. Here are two of the most effective methods:
Using a Plastic Scratch Remover
A plastic scratch remover is one of the easiest ways to remove scratches from plastic trim. These products are designed to remove scratches from plastic surfaces and come in various formulas, including liquids, gels, and pastes.
To use a plastic scratch remover, follow these steps:
- Clean the area around the scratch with a soft cloth and a mild cleaning solution.
- Apply the plastic scratch remover to the scratch, following the manufacturer’s instructions.
- Use a soft cloth to buff the scratch remover into the plastic, working in a circular motion.
- Wipe away any excess scratch remover with a clean cloth.
Sanding and Polishing
If the scratches on your plastic trim are more profound, you may need to use a sanding and polishing method to remove them. Here’s how to do it:
- Clean the area around the scratch with a soft cloth and a mild cleaning solution.
- Use fine-grit sandpaper (around 2000 grit) to sand the scratch, working in a circular motion.
- Once the scratch is sanded down, switch to finer-grit sandpaper (around 3000 grit) and sand the area again.
- Use a polishing compound to buff the area, working in a circular motion.
- Wipe away any excess polishing compound with a clean cloth.
Remember to be gentle when sanding the plastic; you don’t want to create more scratches. Also, make sure to use a polishing compound that is safe for use on plastic surfaces.
By following these methods, you should be able to remove scratches from your car’s interior plastic trim and restore it to its original condition.
Repairing Deep Scratches
If the scratches on your car’s plastic interior trim are deep, you may need a more involved repair process. Here are the steps you can follow to repair deep scratches:
- Clean the area: Start by cleaning the area around the scratch with a mild soap and water. Dry the area thoroughly with a clean towel.
- Sand the scratch: Use fine-grit sandpaper to sand the scratch. Start with 600-grit sandpaper and work your way up to 2000-grit sandpaper, sanding in a circular motion. Keep the sandpaper wet with water to prevent it from clogging up.
- Apply plastic repair compound: Once the scratch is sanded down, apply a plastic repair compound to the area. Follow the manufacturer’s instructions for mixing and applying the compound.
- Sand the area again: After the repair compound has dried, sand the area again with a 2000-grit sandpaper. This will help to smooth out any rough spots and blend the repair with the surrounding plastic.
- Buff the area: Finally, use a soft cloth to buff the area until it is smooth and shiny.
Remember that repairing deep scratches can be time-consuming, but it can save you money compared to replacing the entire trim piece. If you are uncomfortable with this process, it’s best to take your car to a professional for repairs.
How to Repair or Remove Scratches from Interior Car Trim
If you have scratches on your car’s interior plastic trim, there are a few options for repairing or removing them. This section will discuss two methods: using a plastic welder and filling and sanding.
Using a Plastic Welder

A plastic welder is a tool that uses heat to melt plastic and then fuses it. This method is best for deeper scratches or cracks in the plastic trim. Here are the steps to follow:
- Clean the area around the scratch with soap and water and dry it thoroughly.
- Use a plastic welder to heat the area around the scratch until it melts slightly.
- Use a plastic welding rod to fill in the scratch, making sure to smooth out the surface.
- Allow the plastic to cool and harden before sanding it with a fine-grit sandpaper.
- Finish by polishing the area with a plastic polish.
Filling and Sanding
If the scratches on your car’s interior plastic trim are not too deep, you can use a filler to smooth the surface. Here are the steps to follow:
- Clean the area around the scratch with soap and water and dry it thoroughly.
- Apply a plastic filler to the scratch, using a putty knife to smooth it out.
- Allow the filler to dry completely before sanding it down with fine-grit sandpaper.
- Finish by polishing the area with a plastic polish.
Painting the Repaired Area
Once you have repaired the scratched or damaged area, you may want to paint it to match the surrounding trim. Here are the steps to follow:
- Clean the area thoroughly with a plastic cleaner and let it dry completely.
- Sand the surface with a fine-grit sandpaper until it is smooth and even.
- Apply a plastic adhesion promoter to the area to ensure the paint adheres properly.
- Apply a plastic primer to the area and let it dry completely.
- Apply the paint in light, even coats, allowing each coat to dry before applying the next.
- Once you have achieved the desired color and coverage, apply a clear coat to protect the paint and give it a glossy finish.
Using a paint specifically designed for plastic surfaces is essential to ensure proper adhesion and durability. You can find these paints at most automotive supply stores.
Remember to follow all safety precautions when painting, such as wearing a respirator and working in a well-ventilated area. With these steps, you can achieve a professional-looking repair and restore the appearance of your car’s interior trim.
Removing the Trim
If you have decided to remove the trim from your car, you must be careful to avoid damaging the surrounding areas.
Below are the steps you can follow to remove the plastic trim safely and effectively:

- Start by removing any screws or bolts holding the plastic trim in place. You may need a screwdriver or a socket wrench to do this.
- Once the screws or bolts are removed, gently pull the plastic trim away from the car. Be careful not to apply too much force, which can cause the trim to break or crack.
- If the plastic trim is stuck, you can use a plastic trim removal tool to help pry it away from the car. These tools are designed to prevent damage to the surrounding areas, so they are a good investment if you plan to do this type of work frequently.
- Once the plastic trim is removed, you can clean it using a plastic cleaner and a soft cloth. This will help remove any dirt or grime accumulated on the surface.
- If the plastic trim is scratched or damaged, you can use a plastic repair kit to fix it. These kits typically include a filler material to apply to the damaged area, sandpaper, and a primer to help prepare the surface for painting.
- Once the plastic trim is repaired and cleaned, you can reattach it to the car using the screws or bolts you removed earlier. Tighten them securely to prevent the trim from coming loose while driving.
By following these steps, you can remove and repair the plastic trim on your car without causing any damage to the surrounding areas.
How to Repair or Remove Scratches from Interior Car Trim
Tools Required
Before you begin, you will need the following tools:
- Plastic pry tool
- Microfiber cloth
- Plastic polish
- Sandpaper (2000 grit)
- Water bottle with a spray nozzle
Steps to Remove the Trim
- First, you need to remove the trim panel from the car. Use a plastic pry tool to pry the panel away from the car’s interior. Be gentle to avoid damaging the clips or the panel itself.
- Once the panel is removed, lay it on a flat surface covered with a microfiber cloth to protect it from scratches.
- Spray the panel with water to wet the surface. Then, use 2000 grit sandpaper to sand the scratched area gently. Be careful not to sand too hard or for too long, as this can cause further damage to the panel.
- After sanding, use a microfiber cloth to remove excess dust or debris.
- Apply a small amount of plastic polish to the scratched area and use a microfiber cloth to buff it in. Repeat this process until the scratches are no longer visible.
- Once satisfied with the panel’s appearance, reattach it to the car’s interior using the clips.
Following these steps, you can easily remove scratches from your car’s interior plastic trim panels and restore them to their original appearance. Remember to be gentle and take your time to avoid causing further damage.
Replacing the Trim
If the scratches on your plastic car trim are too deep or extensive to repair, you may need to replace the trim altogether. Replacing the plastic trim can be a bit more involved than repairing it, but it is still a task you can do yourself with the right tools and patience.
The first step in replacing the plastic trim is removing the old one. This can be done using a trim removal tool or a flathead screwdriver. Be careful not to damage the surrounding areas or the clips holding the trim.
Once the old trim is removed, you must clean the area thoroughly to ensure that the new trim adheres appropriately. Use mild soap and water to clean the area, then dry it thoroughly.
Next, you will need to install the new trim. This can be done by carefully aligning the clips on the new trim with the holes on the car and pressing the trim firmly into place. Ensure the trim is securely placed before moving on to the next section.
Finally, you may need to adjust the new trim to ensure it fits properly and looks good. Use a heat gun or hair dryer to warm up the plastic trim, and then gently bend it into shape as needed. Be careful not to overheat the plastic, as this can cause it to warp or melt.
Replacing the plastic trim on your car can be challenging, but with the right tools and patience, you can do it yourself and save some money.

Final Touches and Maintenance
Once you have repaired or removed the scratches from your interior car trim, it is crucial to take steps to maintain its appearance. Here are some final touches and maintenance tips to keep in mind:
- Clean regularly: Regularly cleaning your interior car trim will help prevent scratches and maintain its appearance. Use a soft microfiber cloth and a gentle cleaning solution to wipe down the surfaces. Avoid using harsh chemicals or abrasive materials that can damage the plastic.
- Protect from sunlight: Exposure to sunlight can cause your interior car trim to fade and crack over time. To prevent this, park your car in a shaded area or use a sunshade to protect the interior from direct sunlight.
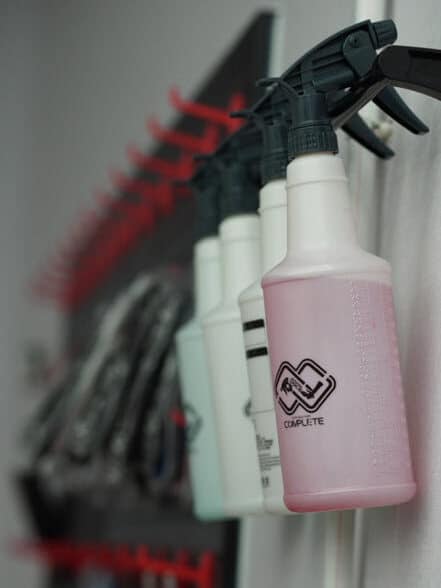
- Use protective products: Various protective products are available that can help prevent scratches and maintain the appearance of your interior car trim. These include spray-on protectants and vinyl conditioners. Be sure to choose a safe product for use on plastic surfaces.
- Avoid sharp objects: To prevent scratches from occurring in the first place, avoid placing sharp objects on your interior car trim. This includes items like keys, pens, and other pointed objects.
Following these simple tips, you can keep your interior car trim looking its best for years.
Frequently Asked Questions
How can I fix deep scratches on my car’s plastic dashboard?
Fixing deep scratches on your car’s plastic dashboard can be more challenging than fixing minor scratches. You can start by cleaning the area around the scratch with a soft, damp cloth. Then, use fine-grit sandpaper to sand the scratch. After sanding, wipe away any dust with a damp cloth. If the scratch is still visible, you can use a heat gun to soften the plastic and then use a plastic repair kit to fill in the scratch.
How do I restore the appearance of my car’s interior plastic trim?
To restore the appearance of your car’s interior plastic trim, you can start by cleaning the surface with a soft, damp cloth. Then, use a plastic trim restorer to bring back the shine. You can also use a heat gun to soften the plastic and then a grain pad to restore the texture.
What is the best way to remove scratches from car interior plastic trim?
Cleaning the surface with a soft, damp cloth is the best way to remove scratches from the car’s interior plastic trim. Then, use fine-grit sandpaper to sand the scratch. After sanding, wipe away any dust with a damp cloth. If the scratch is still visible, you can use a plastic repair kit to fill in the scratch.
Can I use WD-40 to remove scratches from my car’s plastic trim?
No, it would be best not to use WD-40 to remove scratches from your car’s plastic trim. WD-40 is a lubricant and can damage the plastic. Instead, you should use a plastic repair kit or a plastic trim restorer to fix scratches.
Is there a professional service that can repair scratches on car interior plastic?
Yes, professional services can repair scratches on car interior plastic. You can search for local auto body shops or plastic repair specialists to find a professional to help you.
Where can I buy a grain pad to restore my car’s interior plastic trim?
You can buy a grain pad to restore your car’s interior plastic trim at most auto parts stores or online. Make sure to choose a grain pad that matches the texture of your plastic trim for the best results.
Wrapping it all up,
In conclusion, repairing or removing scratches from your car’s plastic interior trim is not as difficult as it may seem. With the right tools and patience, you can have your car looking as good as new in no time. Choose the best method for your specific needs and follow the steps carefully for the best results.
If you enjoyed my post, How to Easily Repair or Remove Scratches from Interior Car Trim, please start a discussion in the comment section at the bottom. Also, please share the post with others online. I would love to hear from you. Maybe you have some tips, tricks, and techniques for repairing plastic trim on your vehicle that I have not heard about.
