

Last updated on January 8th, 2024
Welcome to my latest post, How to Restore Your Hazy Headlights in Under an Hour? Why is this such an important topic to cover; well, if your headlights weren’t so hazy, you would be able to see. Just kidding😉
There are several reasons for restoring or rejuvenating the headlights on your vehicle, but the most obvious one is so you can see clearly and safely while driving at night. Other reasons might be driving in inclement weather or because they look awful when they are hazy or glazed over from a combination of UV rays, oxidation, and contamination. Most importantly, the headlights are no longer safe if they are covered with contamination or UV oxidation.
You can restore your headlights in a few steps; doing it takes less than an hour. This post will highlight the product that I recently used and that I got for under $20.00. I added a step to the process for clarity (Get it? Pardon the Pun). I will outline the steps the manufacturer requires and then walk you through an additional step I took to improve the shine and provide added visibility.
Understanding the Need for Headlight Restoration

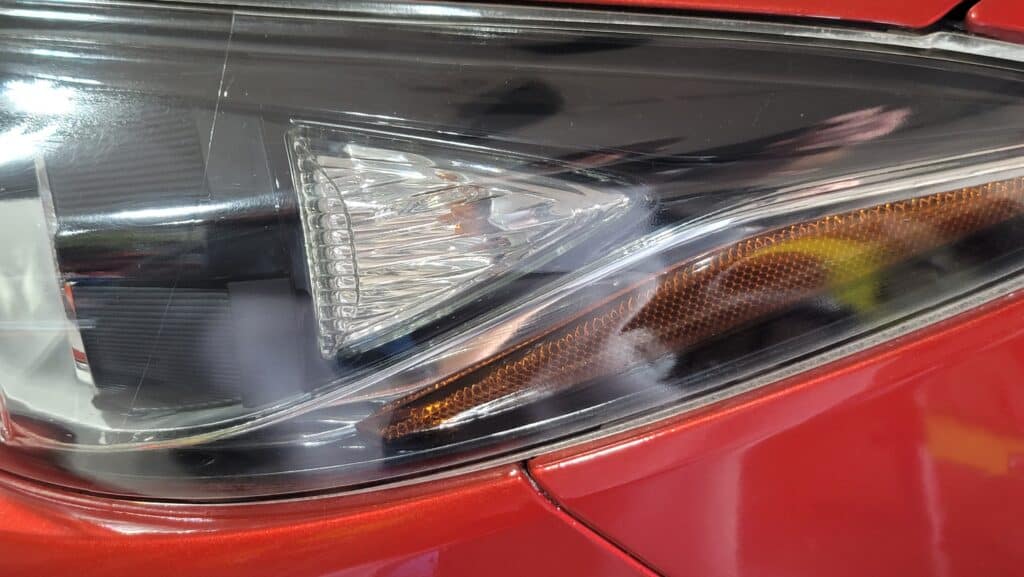
The picture illustrates one of the primary reasons for restoring your headlights. It is a picture of a left-side headlight assembly on a 2014 Red Mazda Hatchback Sport. The right-side assembly is equally as bad.
A client of mine purchased a used Mazda for his daughter. She is a new driver and just got her driver’s license, so he wanted it to be a safe vehicle.
As you can see from the picture and the enlarged picture at Detail Your Rides Photo Gallery, it is a perfect example of what you do not want your headlights to look like. This would not emit enough light for nighttime driving and would be unsafe.
Affiliate Marketing Disclaimer: I am an affiliate marketer with links to online retailers on my website. When people read what I have written about a particular product, click on those links, and buy something from those links, I earn a small commission from the retailer at no extra cost to the buyer.
About Headlight Restoration & Cerakote Ceramic
Headlight restoration is an added service in the automotive detailing industry, and it is one I have performed successfully on a few different vehicles. This was a Mazda, as I mentioned earlier, but I have done similar work on old cars & trucks. The difference was the products that I used on vehicles in the past.
Specifically, I used a product from 3M on my old truck that did not last long before I had it done again at a body shop. I would have used Cerakote if I had known something better was available.
As a result, and from my past experiences, I searched for a product that would last longer. I found a company in the coating industry. Cerakote is an industry-leading thin film ceramic coatings manufacturing company founded over 35 years ago. They manufacture and distribute their coatings to more than 90 countries worldwide. Cerakote manufactures coatings, at scale, for the following industries: Firearms, Aerospace, Fitness, Automotive, Electronics, & much more.
I read somewhere that the Cerakote headlight restoration kit was first available on Amazon in early 2020. Cerakote guarantees the ceramic coating lasts as long as you own the vehicle, or they will send you a new kit.

Preparing to Restore Both Headlights on a Vehicle
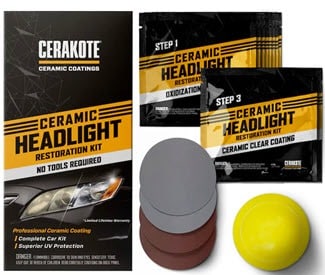
You must wash the vehicle or the headlights to work with a clean surface. Each kit from Cerakote provides enough product to restore two headlights. Additionally, you will need some painter masking tape and a water bottle with a sprayer. Below is a list of the kit’s contents:
- Oxidation removing pads – (8 packs)
- Ceramic Clear Coating pads – (2 packs)
- Ergonomic Surface Prep Sanding Pad – Hook & Loop Design
- 2000 Grit Sheets Wet Sanding Disks – (2 disks)
- 3000 Grit Sheets Wet Sanding Disks – (2 disks)
- Nitrile protective rubber gloves – (2 pair)
- One pair is for pads to remove oxidation, and one pair is for applying the clear ceramic coating.
Once you have acquired the Cerakote Ceramic Headlight Restoration Kit, the painter’s tape, and the water bottle with a sprayer, you can proceed through the three simple steps for restoring your headlights. Below, I will outline how to Restore Your Hazy Headlights in Under an Hour. I included a video from Cerakote’s website below as well.
Don’t get me wrong; there are more than three steps to the whole process, but Cerakote discusses the steps for using the kit. The pre-steps are to tape the areas surrounding the headlights once you have thoroughly cleaned the headlights and the surrounding areas.
Steps for Cleaning, Sanding, & Restoring Your Headlights
- Put on one pair of the provided nitrile gloves, and remove the yellowing oxidation with the chemical oxidation removing pads.
- The oxidation removal pads will get yellowish-brown and dirty as you go through the four provided pads per side.
- Clean and sand both headlights before moving to the Ceramic Clear coat step # 3.
- The oxidation removal pads will get yellowish-brown and dirty as you go through the four provided pads per side.
- Spray water on the headlight. Secure the 2000-grit sandpaper to the ergonomic surface prep sanding pad, and sand in one direction, either vertical or horizontal, but never in circular motions.
- After you have sanded sufficiently with the 2000-grit sandpaper, change over to the 3000-grit sandpaper to remove the sanding scratches left behind from the 2000-grit sandpaper.
- Disclaimer: Ensure the headlights and surrounding areas are thoroughly dry before moving on to the final step.
- After you have sanded sufficiently with the 2000-grit sandpaper, change over to the 3000-grit sandpaper to remove the sanding scratches left behind from the 2000-grit sandpaper.
- Once you have completed the two prior steps on both headlights, apply the ceramic clear coating by wiping the lights with the remaining ceramic clear coat pads. Wipe the lights in one direction.
My Additional Steps for Further Clarifying Headlights
I wasn’t satisfied, and, after all, I told you I would provide an additional step.
My final step was compound polishing and buffing with my Maxshine Mini Cordless Polisher. There was some smudging & marring on the lenses from the ceramic pads. The marring could have been my fault, and maybe the step wasn’t necessary, but it shined up the headlights, making them look new.
Here is a link to the enlarged picture.
Equally important to the steps I have outlined here, Cerakote created the following video to illustrate how to restore your hazy headlights in under an hour.
In conclusion,
I hope you enjoyed the post, How to Restore Your Hazy Headlights in Under an Hour? The restoration process involves straightforward steps that can be completed in three manageable phases. First, you remove the yellowing oxidation with the chemical oxidation removing pads. Then, you clean and sand the headlights using the provided sanding disks. Finally, you apply the ceramic clear coating to give your headlights a brand-new shine.
I provided a little secret from my experience: I recommend a final step of compound polishing and buffing with a Mini Cordless Polisher or a polishing pad attached to a battery-operated drill to enhance the clarity and appearance of your headlights. This extra step, though optional, can take your headlight restoration to the next level, making it look as good as new.
Now that you understand the significance of headlight restoration for safety and aesthetics, I encourage you to act and restore your hazy headlights. You can find the Cerakote Ceramic Headlight Restoration Kit and other necessary tools online or at automotive stores.
Get ready to experience improved visibility, safer driving, and a more attractive vehicle! If you have restored your headlights using this method or have questions, please share your experience in the comments section below. Let’s spread the word about the importance of headlight restoration by liking, sharing, and engaging with this post. Your feedback is valuable, and together, we can make our roads safer, and our vehicles look fantastic!

The headlights turned out great! I feel so much more at ease knowing my daughter’s headlights are brighter at night. Matt Ellis does quality, meticulous work. Thank you Matt!
Thank you, Tyanne.
I am glad you are pleased with the work, and I hope you spread the word to your friends and family about my many automobile detailing services I provide.
Have a wonderful upcoming weekend!
Regards, Matt
Very informative and helpful. Can’t wait to try it.
Thank you for reading my post, Camilla. Please let me know if you need assistance with your headlights.
Regards, Matt
This article is very interesting,
I would like to have you detail my 2012 Cadillac SRX and polish my hazzy headlight lens.
please contact me to schedule an appointment.
Good day, Jeff. I am glad you thought my post was interesting, and I will email you with a quote for restoring your headlamps along with detailing your 2012 Cadillac SRX. Thank you for providing the pictures. Have a wonderful week, and I look forward to servicing your vehicle needs.
Regards, Matt