Last updated on March 20th, 2024
Are you ready to embark on a journey that will transform your car into a shiny masterpiece? Look no further, as I, a passionate car detailing enthusiast, am here to guide you through the intricate art of car detailing. Whether you’re a proud new car owner or someone who wants to revive the luster of their beloved vehicle, this post, The Lost Art: Car Detailing for Beginners guide, is your gateway to automotive brilliance.
Imagine your car radiating under the sunlight, its flawless paintwork reflecting like a mirror, and every nook and cranny boasting a spotless finish. Car detailing is more than just a chore – it is an art form that breathes new life into your ride, making it a true reflection of your style and personality.
In this comprehensive guide, I will take you by the hand and walk you through each step of the detailing process, demystifying the techniques and unveiling the secrets to achieving professional-quality results. We will leave no surface untouched from the exterior to the interior, even the wheels and undercarriage. You will learn which tools and products to use, how to wield them precisely, and how to bring out the full potential of your car’s beauty.
But this journey is not just about transforming your car’s appearance; it is about the joy and satisfaction of the process itself. Get ready to unleash your inner artist as we delve into the world of car detailing together. So, grab your buckets, put on your detailing gloves, and dive into the immersive world of car detailing, where your car’s potential for brilliance awaits.
Understanding the Differences Between Car Washing & Detailing
Affiliate Marketing Disclaimer: I am an affiliate marketer with links to online retailers on my website. When people read what I have written about a particular product, click on those links, and buy something from those links, I earn a small commission from the retailer at no extra cost to the buyer.
Car washing and detailing are two distinct processes that serve different purposes when maintaining a vehicle’s appearance.
Car Washing:
Washing an automobile removes dirt, grime, and contaminants from its exterior. It involves using water, car shampoo, and a sponge or mitt to clean the car’s surfaces. Washing helps keep the car’s exterior clean and prevents the buildup of dirt and debris. However, it does not address more advanced cleaning and restoration needs.
Car Detailing:
Detailing a vehicle goes far beyond basic washing and involves a thorough and meticulous approach to cleaning. Car detailers restore and protect the interior and exterior of the vehicle. It involves a comprehensive process to rejuvenate the car’s appearance and bring it to its optimal condition. Automobile detailing involves cleaning, polishing, waxing, and protecting various vehicle surfaces, including the paint, wheels, tires, glass, trim, and interior components.
Automobile detailing often requires specialized tools, equipment, and products tailored to specific surfaces. It involves techniques such as paint correction to remove swirl marks, oxidation, and scratches and deep cleaning, conditioning, and protecting interior surfaces like upholstery, carpets, and dashboards.
Automobile detailing aims to restore and enhance the vehicle’s overall aesthetics while protecting it from the elements and maintaining its value. It is more time-consuming and thorough than a regular car wash and requires more skill and expertise. In summary, car washing is a basic cleaning process. In contrast, car detailing is a comprehensive approach that aims to restore, rejuvenate, and enhance the vehicle’s overall appearance, inside and out. Please learn more about the lost art of car detailing for beginners below.
The Tools & Products Necessary to Detail Your Ride
I explained many steps to fully detailing a vehicle in other individual posts on my website, but this post will be a much broader view of the all-around detailing process. As I explain the steps, I will provide links to my accompanying posts on the specific task, which will go into more elaborate detail. The subsequent posts will open in a new tab or window in your Internet browser.
As always, when starting a job of this magnitude, I suggest first gathering all your detailing equipment and chemical cleaning products. For this, I built a table of the products I use in my detailing business. Here is the table for you to refer to at your convenience.
If you have any questions at any time, please ask them in the comment section at the bottom of this post or any other post on my website. I am thorough and responsive. You may also ask questions on my social media pages. My Facebook and Instagram profile is @DetailYourRides.
Table of Products and Tools Used for Detailing a Car
Step # 1 – Detailing the Tires & Wheels for Beginners
Indeed, if you have read my post, Revamp Your Tires & Wheels: A Guide to Lasting Shine, you know that I always start a detailing job by cleaning the tires and wheels on the vehicle. Undoubtedly, they are the dirtiest part of the vehicle since they are always touching the road.
For detailing the tires and wheels, I use the following items.
| Chemical Guys Wash Bucket & Rinse Bucket | |
| Hybrid Solutions Pro All Wheel Cleaner + Iron Remover Make sure to read the directions and disclaimers when using all car chemicals. | 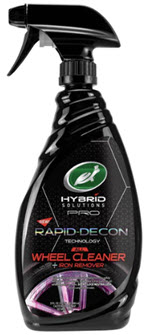 |
Rimpaca Ultimate Wheel Brush Set | 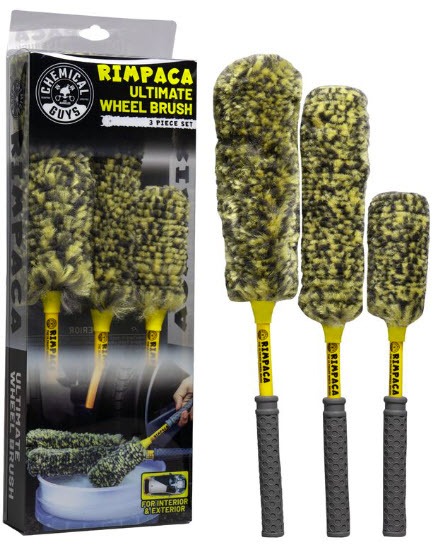 |
| Big Blue Stiffy Heavy-Duty Tire Brush |  |
| Chenille (Blue) Microfiber Wheel Wash Mitt |  |
- Pre-soak the tires and wheels.
- Spray Hybrid Solutions Pro All Wheel Cleaner + Iron Remover on one wheel at a time, allowing for a dwell time. (Do not use it in extreme heat, nor let it dry on the tires and wheels.)
- Next, use your Chemical Guys Rimpaca Ultimate Wheel Brush Set to clean the wheel’s spokes, cavities, and backside.
- After you have cleaned the wheel, clean the tire with your Big Blue Stiffy Heavy-Duty Tire Brush.
- Once the tire and wheel have been thoroughly cleaned, use your Chenille (Blue) Microfiber Wheel Wash Mitt to wipe down the wheel and tire for any spots you may have missed.
- Rinse and repeat the steps from above on the remaining tires and wheels.
I used HydroShield Ceramic Tire, Vinyl, Rubber, and Plastic Ceramic Shine Coating on the tires to add extra shine, protection, and durability.
Step # 2 – Detailing the Car’s Exterior Surfaces for Beginners.
After completing the tires and wheels on the vehicle, thoroughly clean your buckets and other tools. At the same time, start preparing the tools you will need to detail your car’s exterior surfaces.
If you haven’t had an opportunity to read my post about the Top Car Wash Tips for a Flawless Finish, take a few minutes to look it over for a refresher. For this section of the detailing process, I will assume you do not have a Snowfoam cannon and that you will wash the car from top to bottom using the high-touch two-bucket method.
Additionally, I would suspect that you have done a pre-inspection of the exterior surfaces of your car to remove any contaminants from the following list:
- Industrial Fallout
- Brake Dust
- Rail Dust
- Tree Sap
- Road Tar, grease, and grime
- Undercoating Over Spray
- Adhesives
- Bug Guts
- Bird Droppings
However, if you are as detail-oriented as I am, you may have noticed some contaminants on the paint during your pre-soak or pre-inspection of your car. In this case, I will refer you to a post called, What is Automotive Clay Bar Detailing? Why is it Important? Indeed, it details the proper steps for completing a chemical and a mechanical (clay bar) decontamination.
The Lost Art: Car Detailing for Beginners is written to be less explicit about the many other intricacies involved with detailing an automobile. With this in mind, it may be the ideal time to remove more stubborn stains, such as road tar, bug guts, and bird droppings. Some fine chemicals on the market and some elbow grease will take care of this. Often, it is ideal to pre-soak these more stubborn stains before or during your pre-rinse stage.
Tools & Products for Detailing the Exterior Surfaces of Your Car
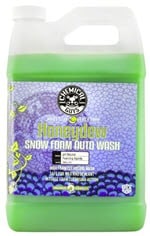
- Shake the Honeydew Snow Foam Extreme Car Wash Soap well and add 1 to 3 oz to a 5-gallon Chemical Guys Wash Bucket or 32 oz foam cannon.
- Pre-rinse the vehicle to remove loose dirt and debris.
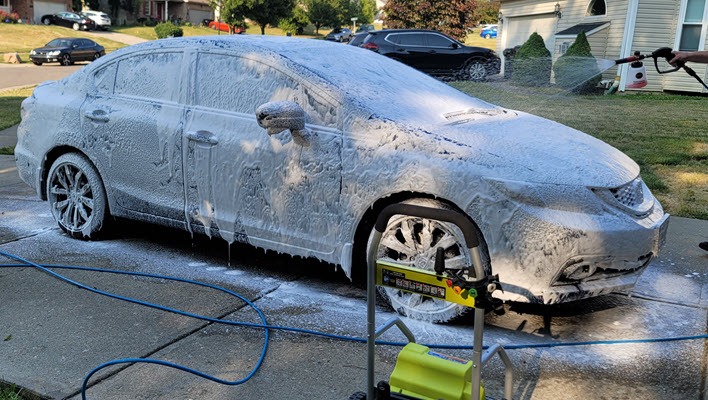
- TORQ Foam Cannon Snow Foamer: spray the vehicle with thick wash foam to protect the paint against swirls and scratches.
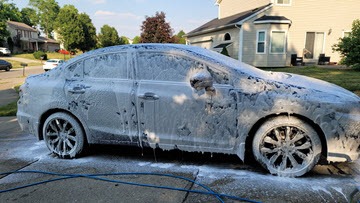
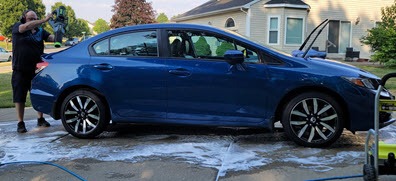
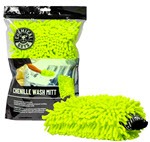
4. Wash the surface with a Chenille (Green) Microfiber Car Wash Mitt and a soapy solution.
5. Rinse using clean water for a perfect shine.
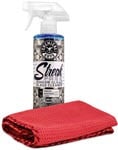
6. Dry with a premium Large Sucker Microfiber Drying Towel (34″ x 28″) from Luxury Microfiber or the Chemical Guys Speed Mammoth Microfiber Drying Towel (25″ x 30″).
Step # 3 – Finish Off the Exterior with a Paint Sealant and wax
After completing the exterior cleaning, I find there is no better time than the present to seal the deal with a coat of paint sealant, followed by a coat of high-quality wax.
The two products I would like to use for this situation are the Chemical Guys Jetseal Durable Sealant & Paint Protectant and a graphene-infused product from Turtle Wax called Hybrid Solutions Ceramic + Graphene Paste Wax.
In light of adding the paint sealant and the wax to detail your ride, the directions for applying the two products are similar and as follows, except for shaking the products.
Steps for Applying Jetseal and Graphene Paste Wax
- STEP 1: Wash and dry your car. (We have already done this).
- STEP 2: For best product performance, prep the surface of your car using chemical decontamination and a clay bar as needed to remove any contaminants embedded in the finish.
- STEP 3: Apply the product to a 2′ x 2′ area using a foam applicator, buffing the product into the finish with overlapping circular motions.
- STEP 4: For the Jetseal Paint Sealant, leave the product on the surface panels for 20 minutes before moving on to step 5.
- STEP 4a: Allow the Turtle Wax Paste Wax to dry for 2-5 minutes or until it has become a light haze.
- STEP 5: Fold a fresh microfiber cloth and gently remove excess product.
- STEP 6: Turn the microfiber, clean, and buff the finish to a high-gloss shine.
- STEP 7: Continue to apply the product to each 2′ x 2′ section of your car until all exterior panels have been covered.
Step # 4 – Finally, Clean the Exterior Windows on Your Car.
I have posted detailed articles about cleaning your vehicle’s exterior windows, and you can find them here: Window to the World: Get Your Car Windows Clean and Clear, and here, Glossy Glass: Polishing Your Windshield to Perfection!
Remember that the exterior windows should be relatively clean after washing & drying your vehicle. Below are the steps that I use when cleaning the outer glass.
In short, when cleaning exterior windows and getting them streak-free, I towel dry them with a clean, high-quality microfiber towel. I have written another post on the towels I use from Luxury Microfiber, and you can see that post called Say Goodbye to Automatic Car Wash Damage with These Tips! I dry from the roof or top down, only making one pass at the windows.
Afterward, I use the Costco-branded Kirkland Select-A-Size paper towels with Rain-X 2-in-1 Foaming Glass Cleaner and Rain Repellent from an 18 oz spray can. I wipe the Rain-X onto the windows in the direction the wind blows. While they are still damp from the Rain-X and the paper towels, I dry them using the box method with my Chemical Guys Waffle Weave Microfiber Window Drying Towel.
Remember: Do not use ammonia-based cleaners when detailing your automobile, especially on glasswork, plastic LCDs, or painted surfaces.
Step # 5 – Moving on to Detailing the Interior
After completing the exterior detailing, we are ready to clean all our exterior detailing tools and products. I have added this cleanup step to allow for drying time on the ground surrounding the car. Also, it is time to gather our interior cleaning products and start detailing the inside of your vehicle.
Additionally, in this part, I will assume several things about those of you reading the post. My assumptions are as follows:
- You are someone who has an understanding of how to keep your vehicle maintained.
- Consequently, you have carpeted with a fabric upholstered interior and carpeted floormats.
- Also, you do not like to spend hours cleaning the inside of your vehicle, so you clean up somewhat after each use.
If my assumptions are inaccurate, you might spend a lot of time working inside your car. Comparable to this scenario, I worked on a car like the one described above. This car was trashed both inside and out. It had not been cleaned on the inside in more than three years. The family that owned it is a dog owner. They have two large breed dogs that shed a lot. I had to remove the front and rear seats, including the seat backs, from the car to extract all of the smelly hair and dirt inside the vehicle. It took me two hours to vacuum the car, and it will probably need more after shining some quality light inside.
As a result, I frequently perform maintenance washes on my vehicles. Above all, I persuade my customers to do the same. If for no other reason than the added expense of paying someone in my line of work an absorbent amount.
Tools and Products for Detailing the Interior of Your Car.
Affiliate Marketing Disclaimer: I am an affiliate marketer with links to online retailers on my website. When people read what I have written about a particular product, click on those links, and buy something from those links, I earn a small commission from the retailer at no extra cost to the buyer.
How to Detail the Interior of Your Vehicle
- First, remove all loose items from your vehicle that will only be in the way while interior cleaning.
- Next, grab your Chemical Guys Dust Monster Merino Wool Duster and dust your hard surfaces.
- After that, use your vacuum cleaner (preferably a wet/dry shop vac with a 4 – 5 horsepower motor) and vacuum the seats, floors, cup holders, door pockets, and other areas that need vacuuming.
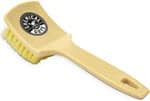
- If necessary, spot clean stubborn stains on carpets and upholstery with your Nice & Stiff Heavy Duty Car Carpet & Interior Brush & the Turtle Wax Spot Clean Stain & Odor Remover.
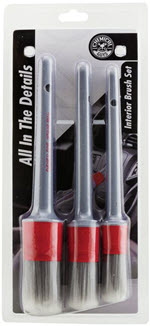
- In this step, you might want to use your Car Interior Detailing Brush Set combined with the Innerclean Interior Quick Car Detailer And Protectant with Baby Powder Scent to clean the trim and hard-to-reach areas of the vehicle.
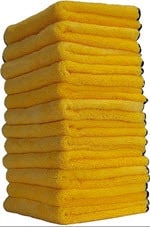
- Next, use your Professional Grade Microfiber Towels to dry the surfaces after completing the different sections of the car’s interior surfaces.
- Accordingly, now is the time if you have leather interior surfaces, you will switch to The Total Fabric & Leather Ceramic Protection Kit from the Chemical Guys to clean, protect, & condition your leather surfaces.
- If you have vinyl, rubber, or plastic, use your VRP – Vinyl, Rubber, & Plastic Protectant instead.
- After thoroughly cleaning your car’s hard and soft surfaces, you can clean the interior glass with the Chemical Guys Streak-Free Kit for Interior Windows.
In Conclusion,
There you have it! The lost art: car detailing for beginners. I hope you found my post informative and helpful. If you have any questions or comments, please leave them below. I would love to hear from you.
In the meantime, why not put your new knowledge to the test? Grab your supplies and get to detailing! Your car will thank you for it.
I know that detailing your car can be daunting, but it’s not as complicated as it seems. Follow the steps in this post, and you will be well on your way to a sparkling-clean car.
Who knows, you might even enjoy it! At any rate, I have found that car detailing can be a very therapeutic and rewarding experience. Believe it or not, it is a great way to relax and de-stress, and it’s also a great way to show your car some love.
What are you waiting for? Get started today!
Please share this post with your friends and family who love cars. Follow me on social media for more car detailing tips and tricks, and leave a comment below to let me know your thoughts on this post.
I can’t wait to hear from you! Thanks for reading!
Best regards, Matt








Hey Matt! Looking to find some quality products to hand wash my recently wrapped car. Do you have any recommendations?
Thank you for visiting my website, and I appreciate your question. Soon I will write a detailed post about how to take care of the vinyl wrap on a vehicle.
In the meantime, please look in your email for links to the products I use and detailed directions for maintaining the wrap on your vehicle.
The reply to your comment did not work, as I would have liked for it to do so. WordPress and the hosting provider often do strange things with the embedded product links and URLs. They were all converted into plain text.
Kindest regards,
Matt
Detail Your Rides